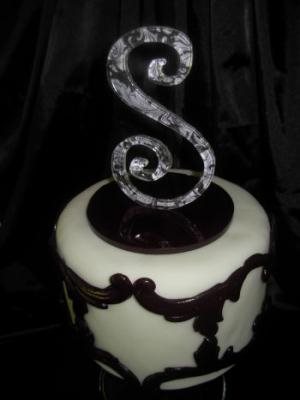
In this tutorial you will learn how to create a simple and elegant monogram cake using Icing Images edible paper to create unique detailed patterns suspended inside a beautiful isomalt cake topper.
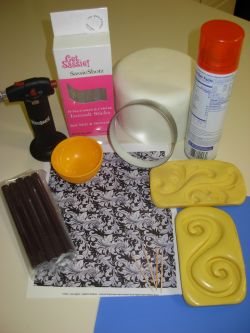
Tools needed for this project:
Fondant covered cake (I used a 6" for this cake)
Clear and Black Isomalt (I used the GetSassie! Brand)
Small Chef's Blowtorch
Small Silicone Bowl
Silicone Mat
Cooking Spray
Icing Images edible paper in the design of your choice (I choose a black and grey design from their iiDesigns program to match my theme)
Monogram or letter mold
Large metal cookie cutter or cake pan (for the base of the topper. For my 6" cake I used a 4 ¾" cookie cutter)
Toothpicks
Microwave (not shown)
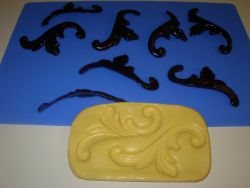
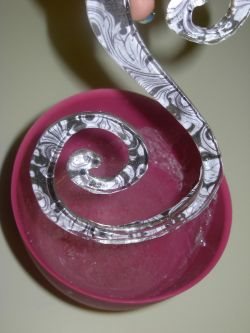
First, I am going to make the swirl decorations to put onto the cake. Melt the isomalt in the microwave (30 seconds and then 15 second intervals until melted) in your silicone bowl. (I use silicone bowls because the isomalt won't stick to the bowl and I will be able to re melt any left over isomalt). Pour the isomalt into the silicone mold, no need to grease or powder the mold since it's made of silicone. It will take about 3 minutes to cool completely, but before it completely cools yet still holds its shape (about 2 minutes), take it out of the silicone mold and bend it around the side of the cake to make sure it will lay flat on the cake when you attach the swirls.
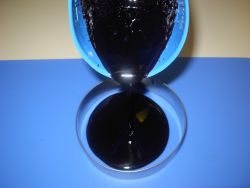
Next we will need a base for the cake topper. Melt the black isomalt in the microwave and pour it into a greased cookie cutter or cake pan. If you are using a cookie cutter lay it on a silicone mat to make sure the bottom will release. Be careful because once you pour it the metal will conduct heat and the cutter will be VERY HOT.
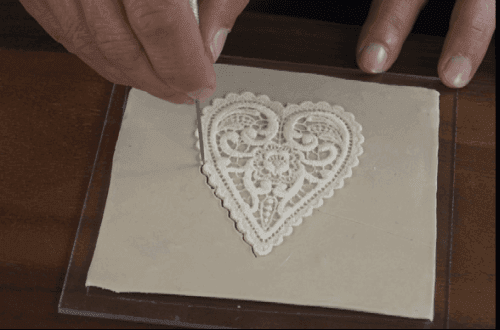
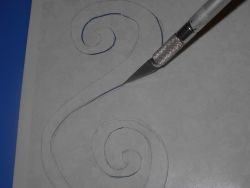
Cast your letter/monogram in clear isomalt. To attach it to the Icing Images first peel the backing off the paper. Flip over the paper and the monogram so they are front-down. Trace the monogram onto the paper to get the exact shape. If you were to trace monogram on the front of the paper you wouldn't be able to see the line on such a dark pattern.
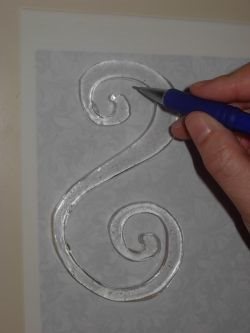
Cut along your trace line with an exacto knife.
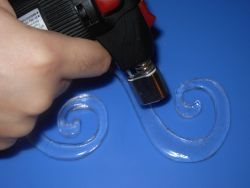
To attach the paper to the isomalt heat up the back of the isomalt monogram with a blow torch. Then lay in onto the pape
You can now trim any edges with an exacto knife that doesn't match up perfectly if needed.
To attach the monogram dip the back of the piece in liquid isomalt and push it down onto the finished base. Do the same with the black swirls and attach them to the cake.
Attach the base to the cake using more liquid isomalt.
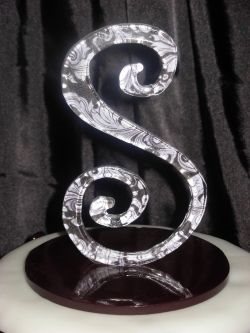
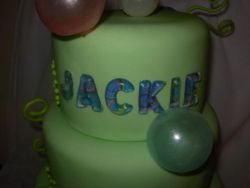
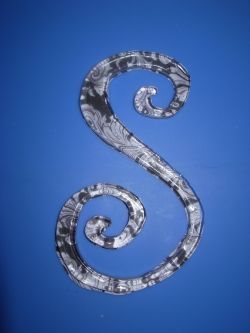
Here is another example of what you can do with Icing Images and isomalt to make letters look fun and intricate!