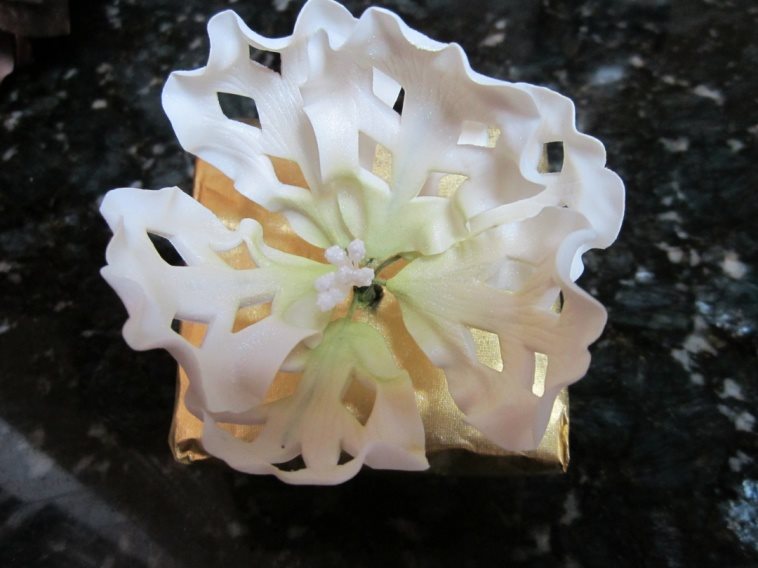
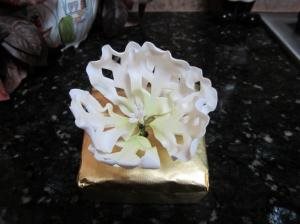
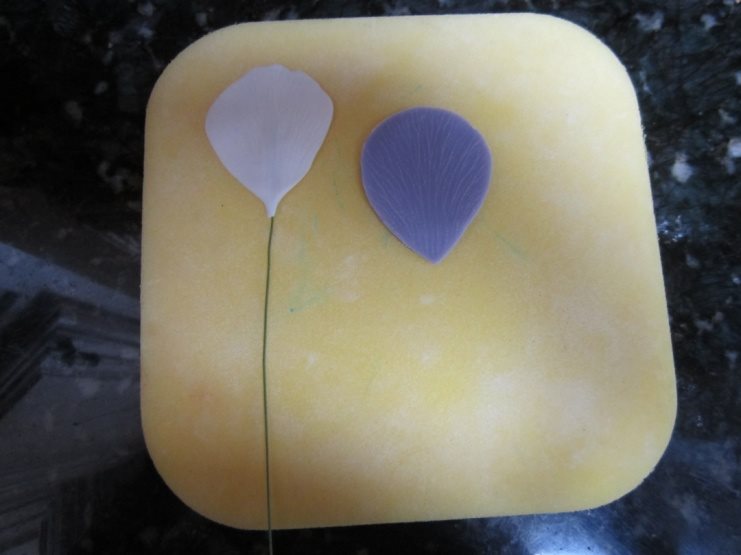
I have come across what I would say are two groups of gum paste flower artists. Those who make sugar flowers that are so botanically correct that it is difficult to distinguish between the sugar flower and the real thing. Then there are those who make what has been coined in the industry as “fantasy flowers”. The flowers are beautiful and creative, but not something you will ever find growing in a garden. I so admire my colleagues who are members of the former category. Admittedly, I am a member of the latter category….fantasy flowers all the way. So, for those of you who are also a member of the club that I am in, I would like to introduce you to my latest creation, which I call the eyelet lace fantasy flower. Here are the step by step photos and instructions on how to create one.
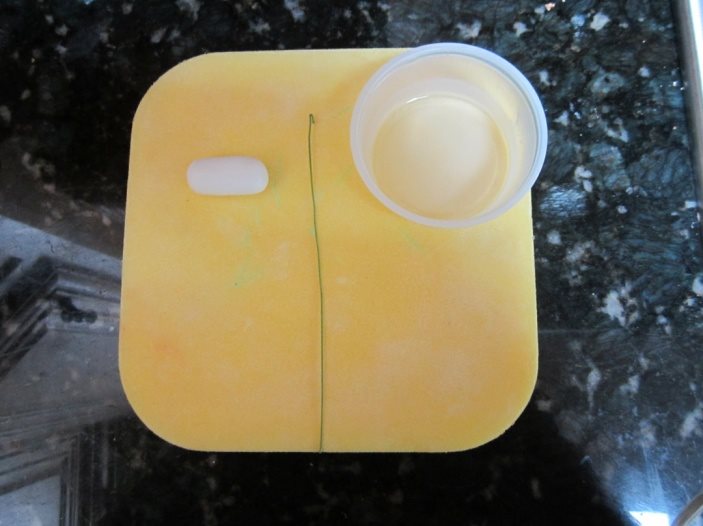
Step 1: Roll out a piece of gum paste that is about 1 ¼ " long x ½” wide. (The size will depend on the type of cutter you use for you flower. I used the poppy flower cutter).
Step 2: Hook the end of a green 24 gauge wire using needle nose pliers.
Step 3: Have some clear extract or water in a small bowl.
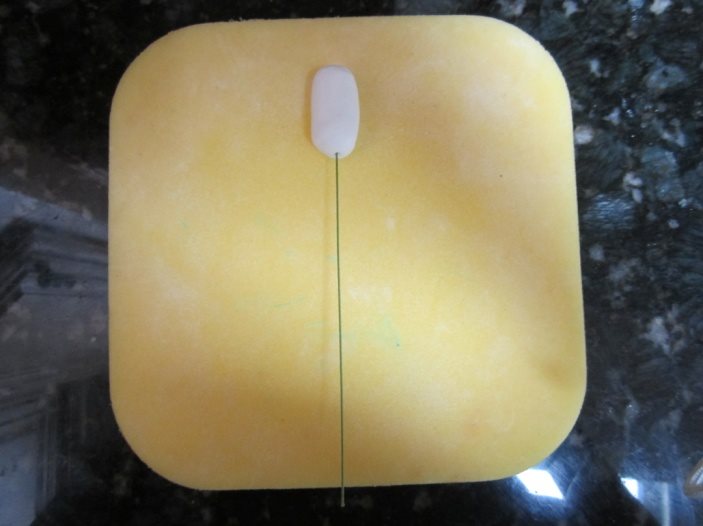
Step 4: Dip the hooked end of the wire into the extract or water.

Step 6: Using a dowel, roll gum paste to about 1/8” thickness. Do this first on the right side of where the wire is inserted, then on the left side. This will allow the center of the gum paste where the wire is inserted to be slightly thicker than the sides so that the wire does not come thru the gum paste.
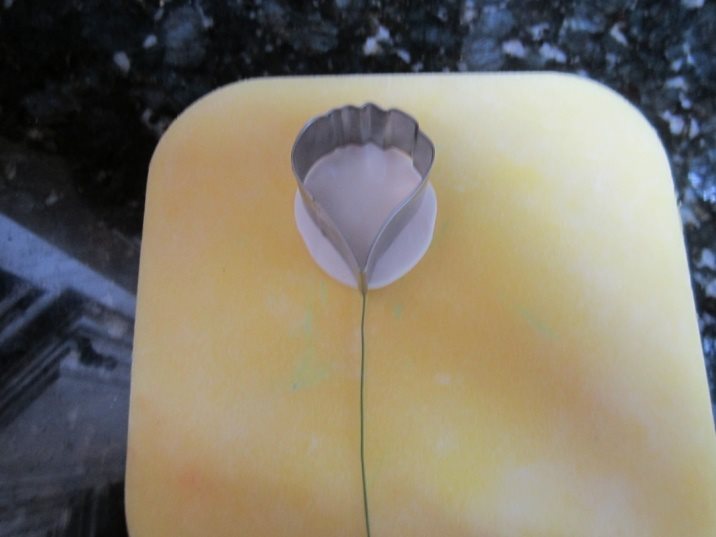
Step 8: Take whatever cutter you have chosen and place it over the wired petal.

Step 9: Gently press the cutter into the gum paste to cut out the shape. Clean the edges of any excess gum paste.
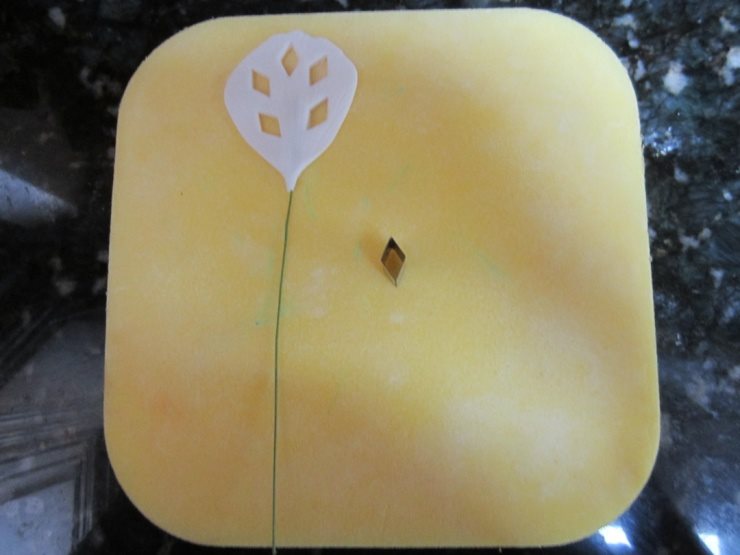
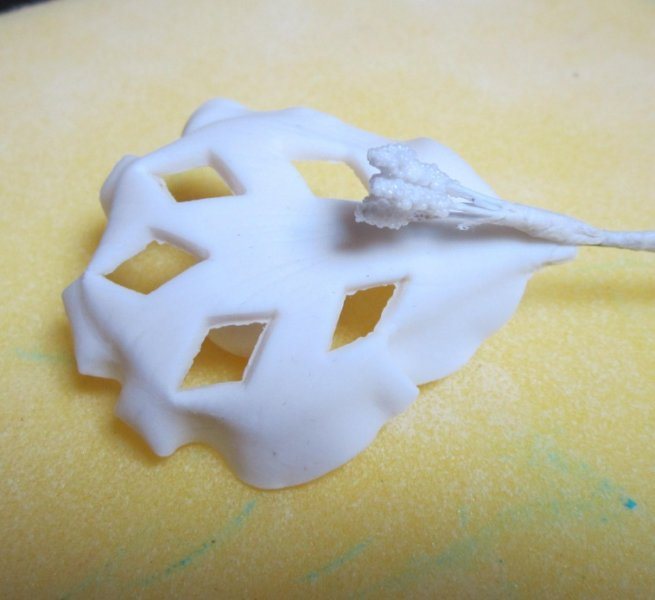
Step 11: Use whatever miniature cutter shape you choose to make the “eyelet lace” cuts. Here I have chosen a diamond cutter. You could also use a plain round pastry tip as a cutter to make the lace.
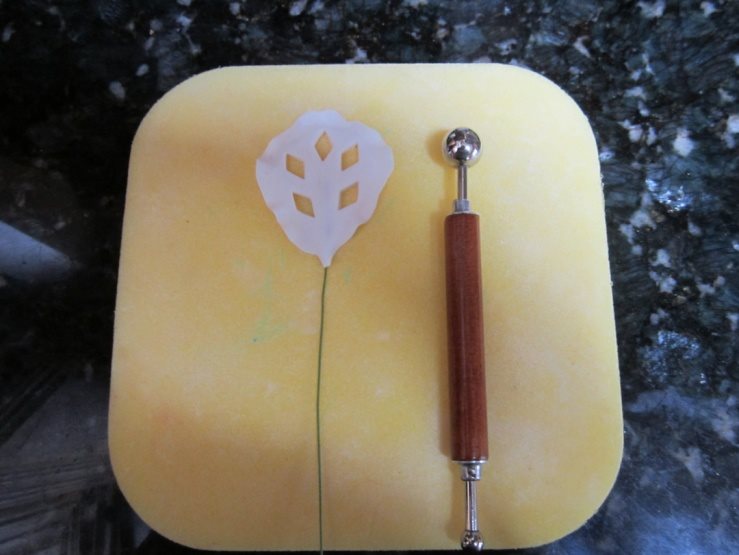
Step 12: Place the petal on a celpad.
Step 13: Using a metal ball tool, ruffle the edges of the petal. This is done by placing the ball tool halfway on the edge of the petal, and halfway on the celpad. Then apply some pressure as you roll the ball tool along a portion of the petal and then lift the ball tool off of the petal. Repeat until you have ruffled around the entire edge of the petal.
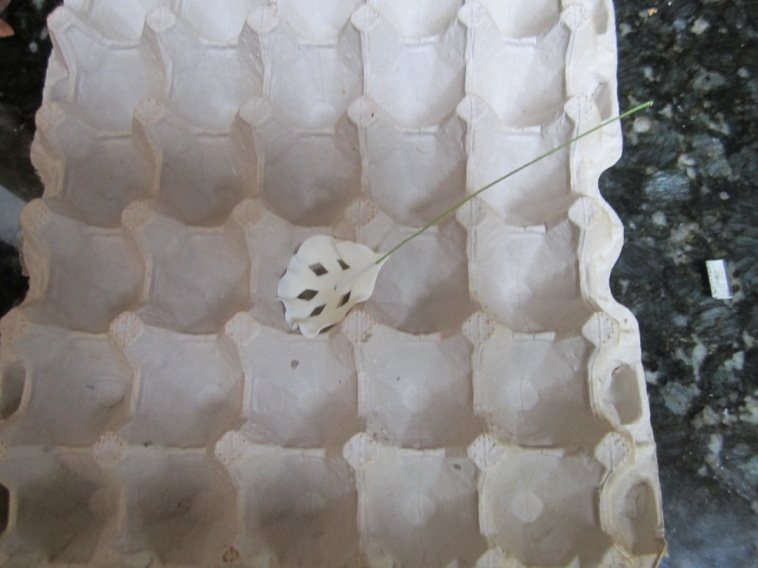
Step 14: Place the petal in an egg crate or something curved, veined side down, to dry the petal.
Step 15: Repeat steps 1 thru 14 five more times to have a total of 6 petals.
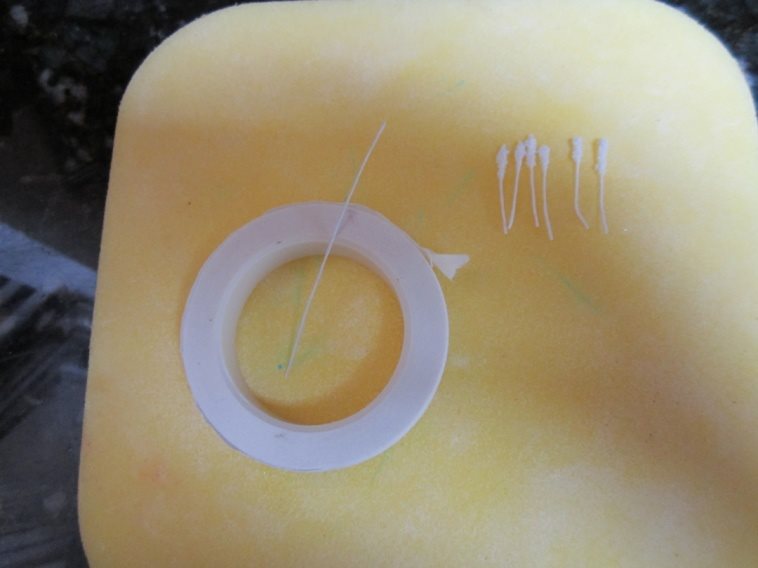
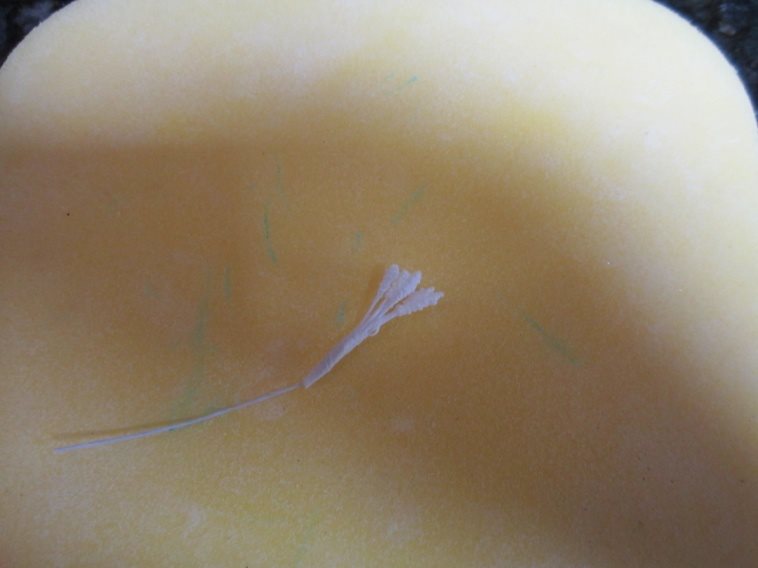
Step 16: Prepare the stamens. You will need about a 4” piece of white 32 gauge wire, white or green floral tape and your choice of stamens.
Step 17: Arrange the stamens (6 stamens are used here) around the 32 gauge wire.
Step 18: Wrap the stamens around the wire with the floral tape. As you wrap the floral tape around the stamens, pull the tape as you wrap. This will secure the tape.
Step 19: At this point, you can dust the throat of each petal with luster dust before assembling the final flower.
Step 20: Using floral tape, attach the wired stamens to the first petal.
Step 21: Continue attaching the next 2 petals, spacing them evenly.
Step 21: Arrange the last 3 petals evenly spaced behind the first 3 petals.
Step 22: Once all of the petals have been attached, you can now gently tweak the placement of the petals if necessary. At this point, you can also highlight the flower with some luster dust.
Congratulations!! You are now a fantasy flower artist.